DIY: Painted Kitchen Utensils

On the 3rd day of holiday DIY my true love gave to me, a bunch of kitchen utensils that will help to stir my tea. OK, I tried with something kitchen-y to rhyme with me...twas harder than I planned! After scouring Pinterest, like you do, I saw a bunch of kitchen utensils (serving spoons, spatulas) that were painted!  I thought that they would make an easy and practical gift that you can bring to your party hosts or to stick in stockings!!

DAY 3: Painted Kitchen Utensils

New Dress A Day - DIY - painted kitchen utensils

Here's what you'll need...

New Dress A Day - DIY - painted kitchen utensils

1. Kitchen utensils (I found these wooden and bamboo spoons at the 99 cent store)

2. Acrylic paint (go for holiday shades, or ones that match the kitchen of the recipient!)

3. Clear shellac (this Zinsser spray is genius - it's non-toxic so it works on things like these utensils or any other craft projects!)

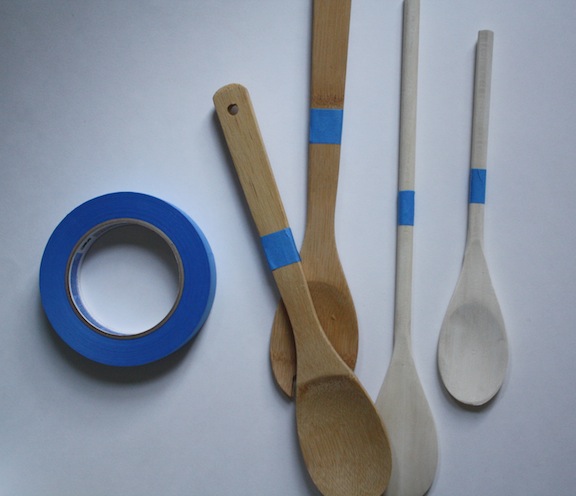
4. Painter's tape (This Scotch blue roll works well or you can always use masking or duct tape that might be in your house already)

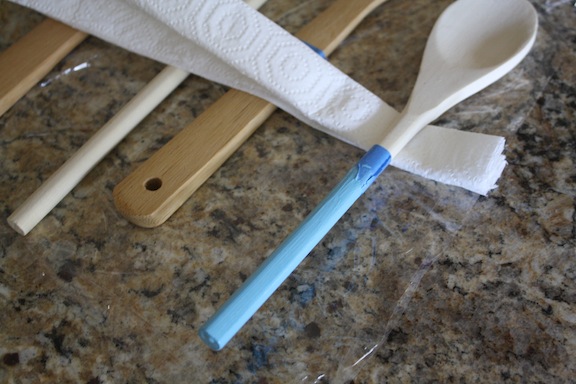
My first step was taping the utensils.  I chose how low I wanted the paint to go and put a piece around the area picked.

New Dress A Day - DIY - painted kitchen utensils

Next it was paint time!  I had some foam brushes that I used, but feel free to go at it with your fingers!  This is also a fun project that kids can get involved with too - nothing like some family finger painting!

New Dress A Day - DIY - painted kitchen utensils

With fun shades painted first...

New Dress A Day - DIY - painted kitchen utensils

...I finished up my last two utensils with a subtle shade of gold.

New Dress A Day - DIY - painted kitchen utensils

Once the paint is dry, spray the clear shellac on top of the painted areas and let dry for at least an hour.  After it dries, take off the painter's tape and your project is complete!

My mom is definitely not going to be surprised when she sees these popping out of her stocking next week.

New Dress A Day - DIY - painted kitchen utensils

This is a fab hostess gift year round too!  I should make a stash to have on hand...

More DIYs coming tomorrow!!

Katharina's NDAD Creation: Holiday Edition

As soon as Katharina sent this my way, I had to post it! We're all in holiday mode and everywhere I turn there's decor. Be it in stores, in front of people's houses, and even on cars! I was lucky enough to catch a Hanukkah parade in LA that consisted of a string of cars driving with twinkle light menorahs on their roofs! I need some holiday car bling! In the meantime, check this project out...

Hello from Rio!  Last year, I was amazed with a picture I found on Tumblr...

New Dress A Day - DIY Christmas ornament hanging tree

...and it served as inspiration for my mother and sister to make our own. We had no idea how they made it, so we created something up ourselves.

We bought two stars made of some sort of woven straw to serve as a base and then my mom tied them together. We hung it to our ceiling using hooks that my grandfather had made for my fifteenth party. In Brazil, we don't have sweet sixteen parties, we celebrate girls' 15 years, similar to a quinceañera).

New Dress A Day - DIY Christmas ornament hanging tree


After that we sewed each ornament onto the base, using a whole lot of nylon thread! Yes, the tree was hanging the entire time, so we stood on chairs because we needed to see the height of each ornament as we placed it. It was three days of work with  glitter all over our dining living room area to show for it, but we did it!

New Dress A Day - DIY Christmas ornament hanging tree

Of course, during the process we looked up "hanging Christmas tree" and saw the there was a much simpler way to do it, with hooks and a different base, but we're still proud of our version! You see, when you live in a hot place like Rio, where Christmas is during the summer, the whole fake snow/pine tree act just doesn't cut it. I think our tree is more tropical weather appropriate.

New Dress A Day - DIY Christmas ornament hanging tree - Grey's Anatomy Christmas

PS, this next picture is the view from under the tree.

New Dress A Day - DIY Christmas ornament hanging tree

My sister and I love to lie under Christmas trees and look at the twinkling lights, just like Meredith, George and Izzie did on Grey's Anatomy.

New Dress A Day - DIY Christmas ornament hanging tree - Grey's Anatomy Christmas


Doing that underneath this tree is a whole other experience! Hope you liked it, Marisa! Boas Festas! ("Happy Holidays" in Portuguese), Feliz Natal (Merry Christmas), e feliz ano novo (Happy New Year)!

Katharina, your tree is just spectacular! I think it looks amazing and I love that it was a family affair. Everyone got involved to create this beautiful piece which brings a smile to my face. You're totally right - how bizarre must it be in tropical weather to have a big pine tree in your house? This does the trick perfectly and it is so perfect for the holidays! I need to try this on out at some point myself. Feliz ano novo to you too!

DIY: Cabochon Stud Earrings

On the 2nd day of DIY my true love gave to me. Two flower earrings and (yesterday's) partridge in a (pair of gloves) tree.  I think this lyric modifying is going to get difficult from here on out.  Bear with me and the puns :) DAY 2: Cabochon Stud Earrings

New Dress A Day - Holiday DIY - stud earrings

This is a project that I love to make for myself, just because I basically only wear stud earrings.  I love hanging ones, but I can only wear them if I put a clip-on back on them all thanks to wearing big, heavy pairs when I was an 80s kid!  My lobes never recovered.  Le sigh.

Here's another quick and easy DIY to add to your gifting list!

The project needs only a few supplies...

New Dress A Day - Holiday DIY - stud earrings

1. Cabochons (These are flat backed beads that you can score at any craft store.  I found these vintage-feeling ones in the fabric district downtown for 20 cents a pop, but here's a cute stash I found online.)

2. Earring pin posts/stud backs (I bought a big bag of these years ago and am still using them. There's a pack of 100/$4 here!)

3. Toothpick (The best tool for applying glue!  Feel free to use whatever you have close by to apply.)

4. E-6000 (The glue of champions. This stuff works SO well.)

I opened my tube o'glue and dipped in the toothpick to get a good amount on the tip (1) and then dabbed the back of one of the cabochons (2).  I took the pin post and pushed it into the glue to stick (3)...

New Dress A Day - Holiday DIY - stud earrings

...and then repeated this process for the other cabochon.  Once the earrings were put together, I let them dry for a few hours.

New Dress A Day - Holiday DIY - stud earrings

And in no time, a brand new pair of earrings are done and ready to be rocked!

New Dress A Day - Holiday DIY - stud earrings

This would also work really well for metal backed ring bases, using a larger cabochon to create a statement ring!  Hmm, maybe you'll see that DIY in a few days?

Two DIYs down, 10 more to go!