DIY: Olympic Rings Necklace

As the Olympics start today, I thought I'd repost one of my favorite pieces that I crafted back in 2012 for the summer Olympics!!  I can't wait to watch the figure skating and the skiing/snowboarding and root for USA! So, I'm totally an Olympic addict.

Olympic Rings

I absolutely love the Olympics and get so excited every two years because I get sucked into the competitions...all the competitions!

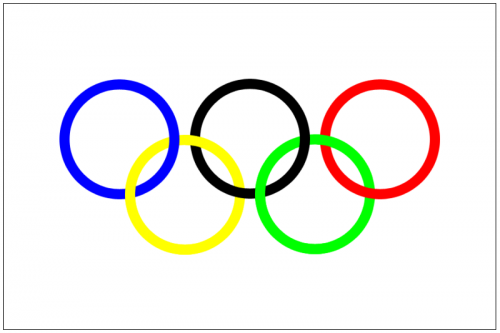
After seeing those rings on screen all the time, they've been lasered into my head (along with the theme song - I'll spare y'all the clip...I can't stop singing it after every commercial break!) and I came up with a fun project to show my Olympic spirit!

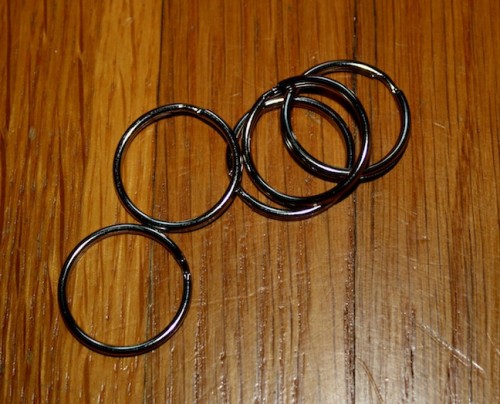
It's necklace time!!  I began with five key rings...

New Dress A Day - DIY - Vintage Dress - Olympic Rings Necklace - 5 Key Rings - 81

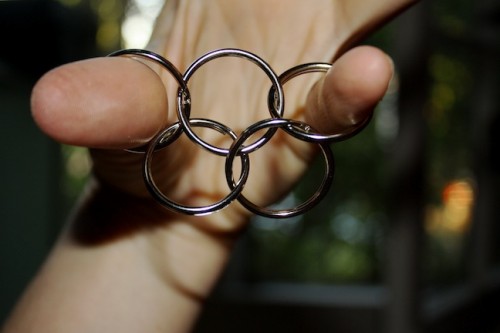
...and created the formation, attaching the rings to each other.

New Dress A Day - DIY - Vintage Dress - Olympic Rings Necklace - Key Rings - 81

Time to get these bad boys in their right shades!

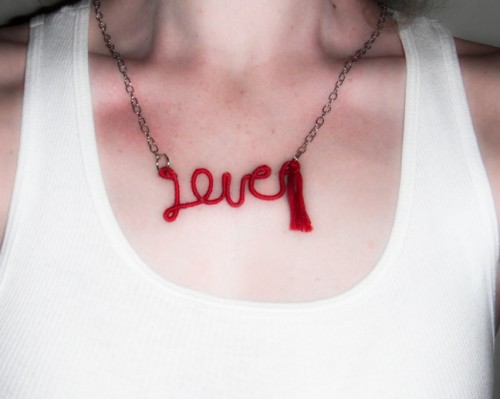
Taking a cue from the Anthropologie lookalike necklace I made a few months back...

New-Dress-a-Day-Necklace-DIY-Love-Necklace-After-ECU-172

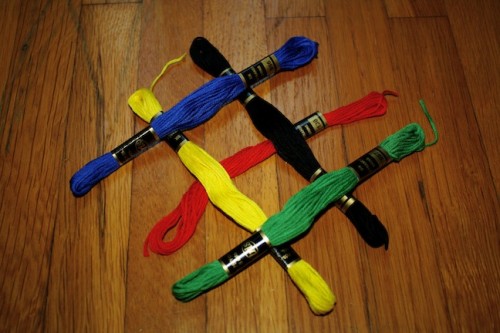
...I decided to work with embroidery floss again!

New Dress A Day - DIY - Vintage Dress - Olympic Rings Necklace - Embroidery Floss - 81

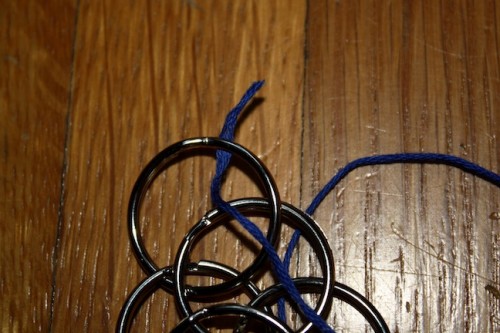
I began with the ring all the way to the left and grabbed the floss in blue!  I kept the floss in place by putting it right at the ring opening before adding E-6000 glue to really secure.

New Dress A Day - DIY - Vintage Dress - Olympic Rings Necklace - Start Point - 81

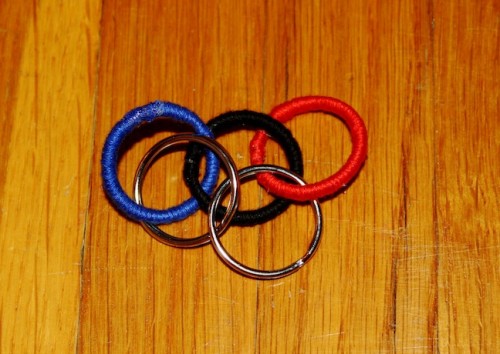
Then began the wrapping!  I did this method for each of the rings.  I had the top row of three complete...

New Dress A Day - DIY - Vintage Dress - Olympic Rings Necklace - 3 Rings Finished - 81

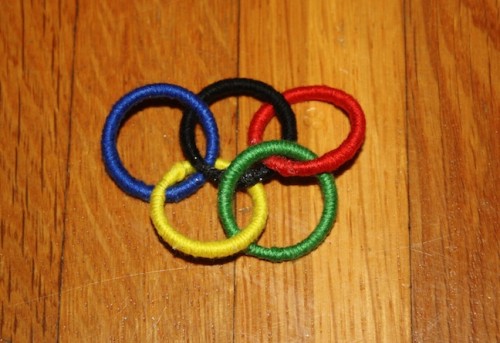
...and then got the final two finished as well.

New Dress A Day - DIY - Vintage Dress - Olympic Rings Necklace - Intact Rings - 81

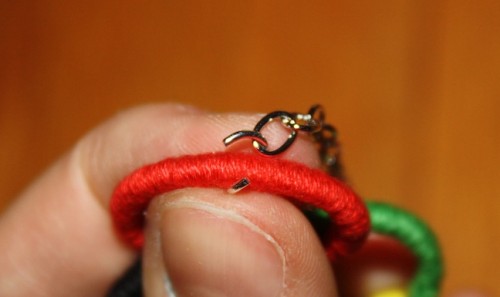
I took some craft chain I picked up at Joann's along with jump rings and connected both to the blue and red rings at each end.

New Dress A Day - DIY - Vintage Dress - Olympic Rings Necklace - Spring Ring Attachment - 81

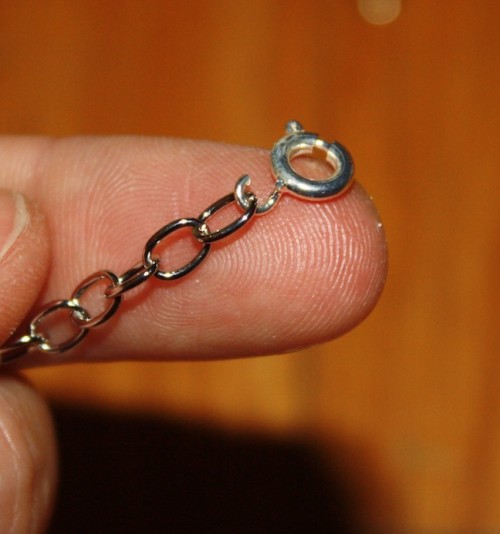
Once the chain was connected, I added a spring ring clasp to one of ends of the chain...

New Dress A Day - DIY - Vintage Dress - Olympic Rings Necklace - Necklace Clasp - 81

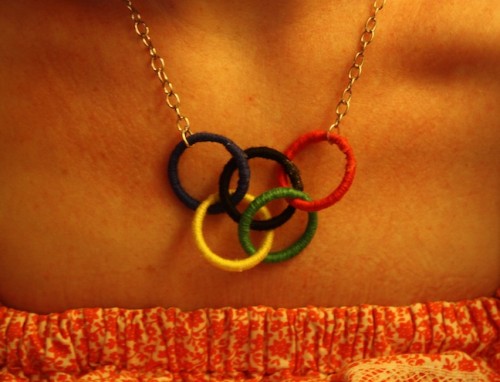
I couldn't wait to get this around my neck!

New Dress A Day - DIY - Vintage Dress - Olympic Rings Necklace - Finished Rings - 81

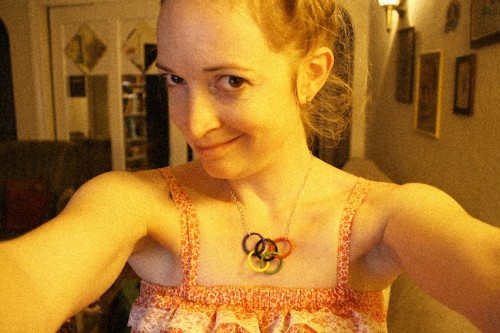
It was like my gold medal!

New Dress A Day - DIY - Olympic Rings Necklace - Finished Look

DIY: Heart Friendship Bracelet

I was asked by eHow to contribute a Valentine's Day article on how to make heart friendship bracelets and I couldn't wait to finish so I could post here! I made a slew of them for my wrists and will be wearing them loud and proud, not just on V-Day but all the time. DIY Heart Friendship Bracelet - ehow - Marisa Lynch - Valentine's Day
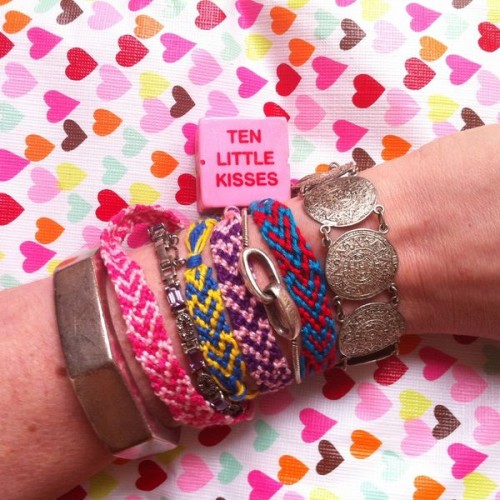
If you would like to see the project steps in slideshow mode, head on over HERE to eHow to check it out with clickable slides!

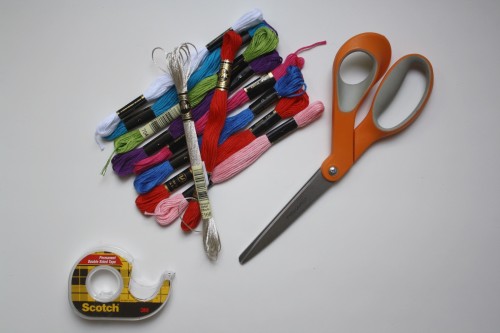
In order to create your heart friendship bracelet, you'll need: 2 skeins of embroidery floss, 4 30" strands per color, a pair of scissors, and a clipboard or tape to hold the bracelet in place while working.
DIY Heart Friendship Bracelet - ehow - Marisa Lynch - Valentine's Day

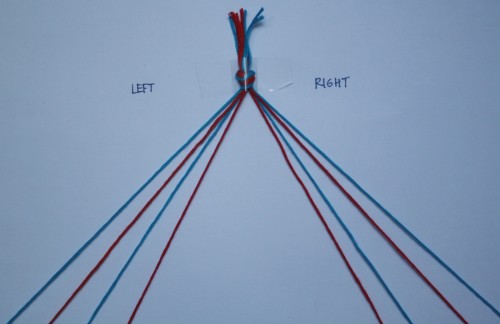
Take the eight strands of embroidery floss and tie them together in a knot leaving about an inch and a half of floss above the knot. (This will be used to tie the bracelet together at the end.) Lay out the eight strands and split them up (four and four) onto the right side and left side of the workspace. Alternate colors (in this case - blue, red, blue, red) on the left side and then mirror these four on the right side (in this case - red, blue, red, blue).
DIY Heart Friendship Bracelet - ehow - Marisa Lynch - Valentine's Day

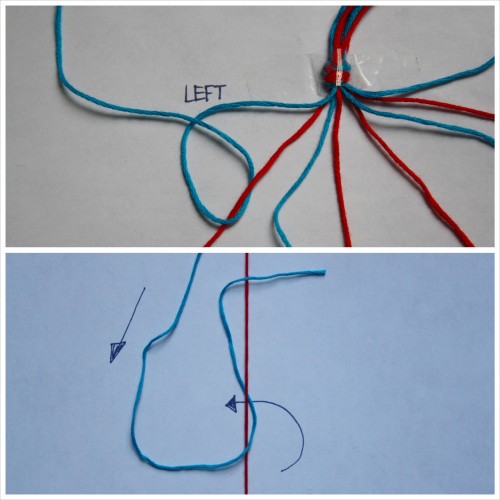
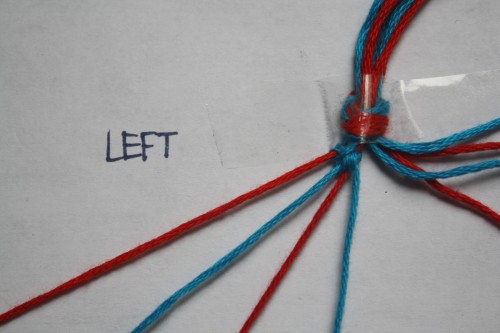
Begin the bracelet on the left side by making a forward knot using the strand all the way on the left outer end (blue) and the second strand right next to it (red).

(*To create a forward knot, make a 4 with the working string, loop it under the other string, pull it through the opening and bring it to the top of the bracelet. Do this two times to create one forward knot.)
DIY Heart Friendship Bracelet - ehow - Marisa Lynch - Valentine's Day

Repeat this step with the next two strands (third and fourth threads, corresponding blue and red colors) and stop at the center.
DIY Heart Friendship Bracelet - ehow - Marisa Lynch - Valentine's Day

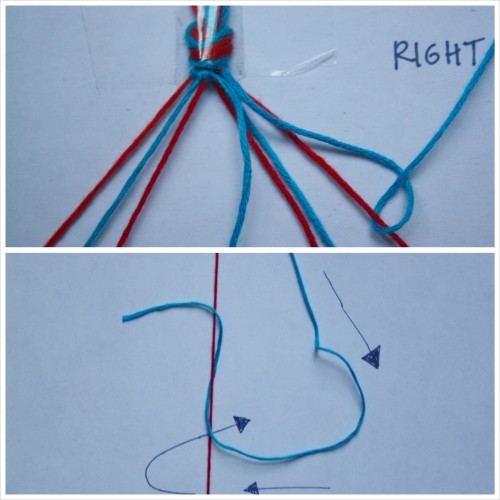
Now that the left side has been completed, these same steps will be mirrored on the right side of the bracelet. Instead of a forward knot that was used on the left side, a backward knot will be made using the strand all the way on the right outer end (blue) and the second strand right next to it (red).

(*To create a backward knot, which is virtually a mirror of the forward knot on the right side, make a backwards 4 with the working string, loop it under the other string, pull it through the opening, and bring it to the top of the bracelet. Do this two times to create one backward knot.)
DIY Heart Friendship Bracelet - ehow - Marisa Lynch - Valentine's Day

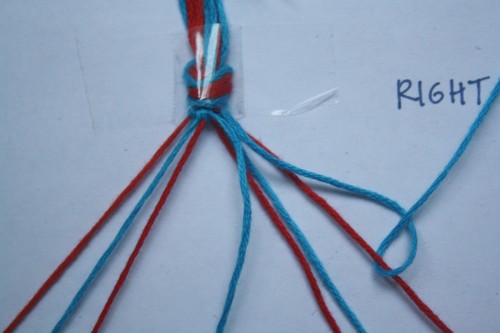
Repeat this step with the next two strands (third and fourth threads, corresponding blue and red colors) and stop at the center.
DIY Heart Friendship Bracelet - ehow - Marisa Lynch - Valentine's Day

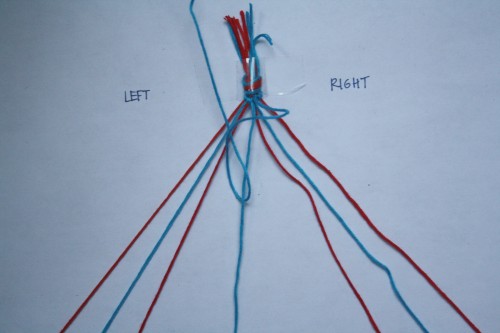
Connect the two middle strands by creating a backward knot using the strand on the right (the last one used). This brings both sides together as one.
DIY Heart Friendship Bracelet - ehow - Marisa Lynch - Valentine's Day

Repeat the above steps and create one more row in the exact same way, using the outermost string on each side.
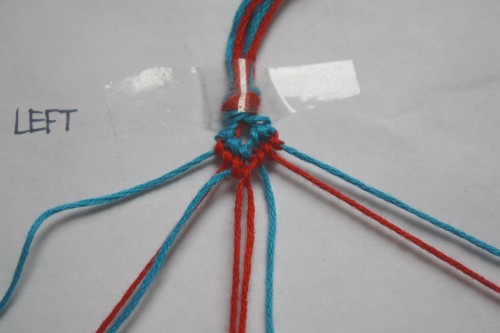
DIY Heart Friendship Bracelet - ehow - Marisa Lynch - Valentine's Day

Now that the second row is completed (we’ll call these the REGULAR rows as they will look like a traditional chevron styled friendship bracelet), the third row is going to be done a little differently (we’ll call these the NEW rows). Take the second string on the left side (red) and make a backward knot on the first string (blue).
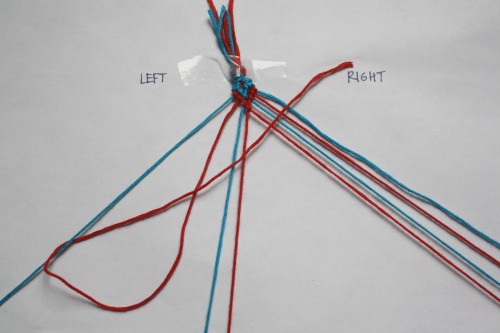
DIY Heart Friendship Bracelet - ehow - Marisa Lynch - Valentine's Day

After the backward knot is completed, move the string that was used (second string in red) to the top left side and create two more forward knots using the first string (blue) on the third and fourth strings and stop at the center. This is where the heart shape begins to take form.
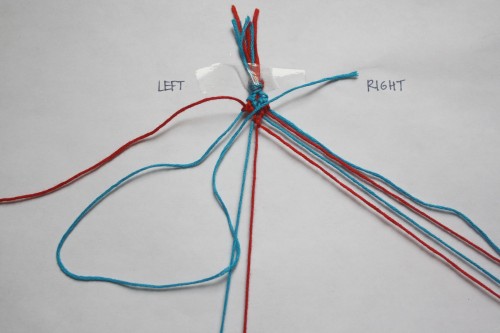
DIY Heart Friendship Bracelet - ehow - Marisa Lynch - Valentine's Day

This same step will be mirrored for the right side. Take the second string on the right side (red) and make a forward knot on the first string (blue).
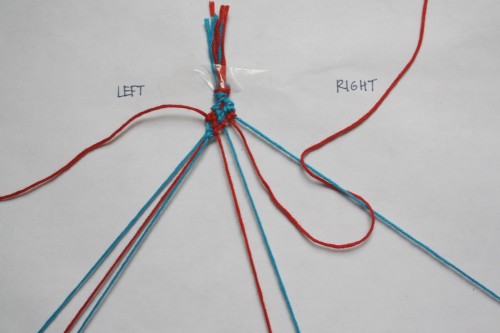
DIY Heart Friendship Bracelet - ehow - Marisa Lynch - Valentine's Day

After the forward knot is completed, move the string that was used (second string in red) to the top right side and create two more backward knots using the first string (blue) on the third and fourth strings and stop at the center.
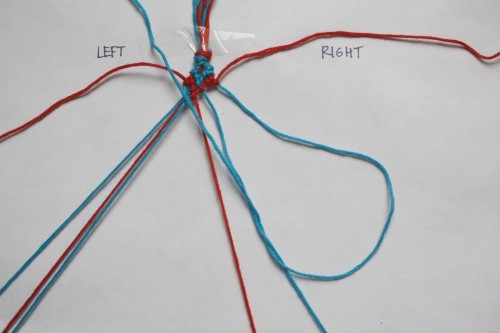
DIY Heart Friendship Bracelet - ehow - Marisa Lynch - Valentine's Day

Connect the two middle strands by creating a backward knot using the strand on the right (the last one used). This brings both sides together as one.
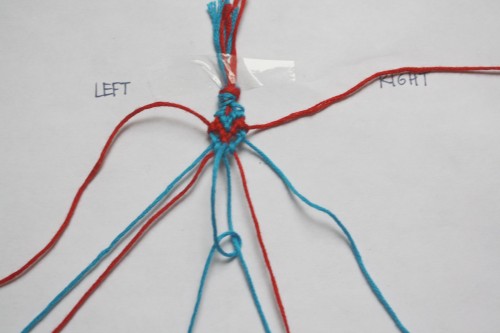
DIY Heart Friendship Bracelet - ehow - Marisa Lynch - Valentine's Day

Repeat the above steps for making a NEW row and create one more NEW row in the exact same way, using the second string on each side.
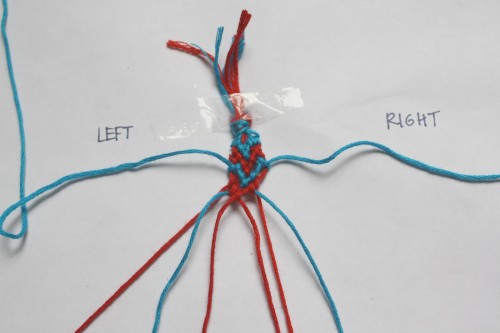
DIY Heart Friendship Bracelet - ehow - Marisa Lynch - Valentine's Day

The bracelet pattern is now set. Two REGULAR rows of the basic forward knots on the left side and backward knots on the right side followed by two NEW rows of the backward/forward knots on the left side and forward/backward knots on the right side.
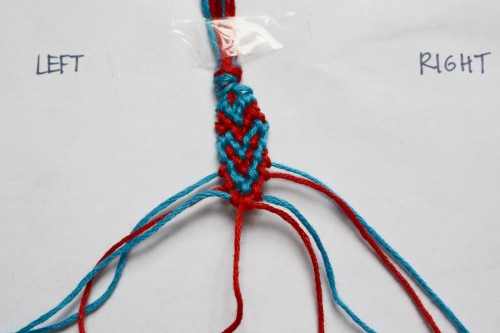
DIY Heart Friendship Bracelet - ehow - Marisa Lynch - Valentine's Day

Repeat and continue these steps until enough bracelet has been made to fit your wrist.
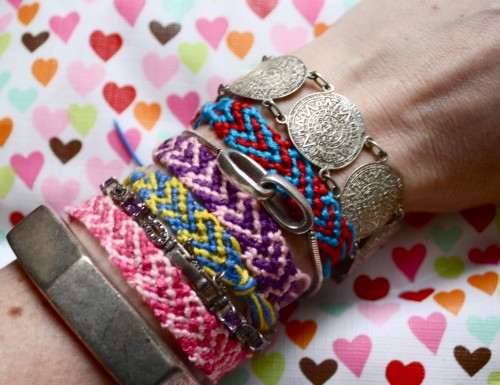
DIY Heart Friendship Bracelet - ehow - Marisa Lynch - Valentine's Day

This is such fun to make bracelets in school colors, fave sports teams, or just colors you heart. I just might make a few more before next week!

Copycat: Hudson Brit Punk Jeans

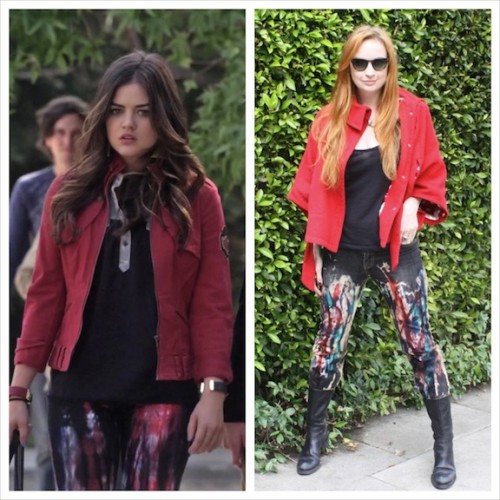
I haven't done a fun denim DIY in a little while, so when I found these rocker jeans by Hudson I had to add them to the list!! I saw them being worn by Lucy Hale (Aria) on Pretty Little Liars (yes, I've started to get a little sucked in!) and the wheels started turning. (For those Pretty Little Liars fans, you can head over here to HelloGiggles to read the post with the full TV tie in!) New Dress A Day - Hudson Jeans Copycat - DIY - dyed jeans
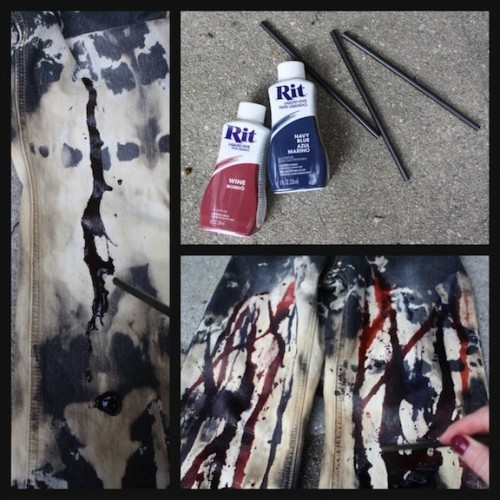
The actual jeans on Lucy are by Hudson and they’re an ode to the Union Jack flag, in a deconstructed way. It's Brit punk, fo sho, and I wanted to try my hand at remaking them!

New Dress A Day - DIY - Hudson Jeans - Collin Brit Jeans

The key to remaking this piece is the base....

...a pair of black jeans that can be bleached and re-dyed with red and blue shades to match the original piece.

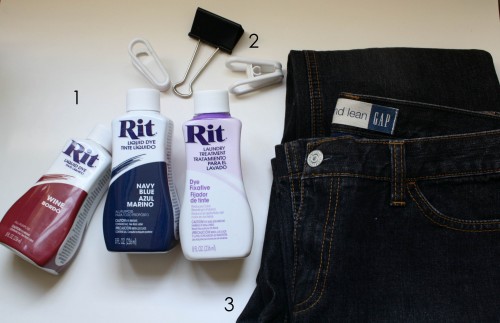
Here’s a rundown of the supplies you’ll need:

New Dress A Day - DIY - Hudson Jeans - Collin Brit Jeans

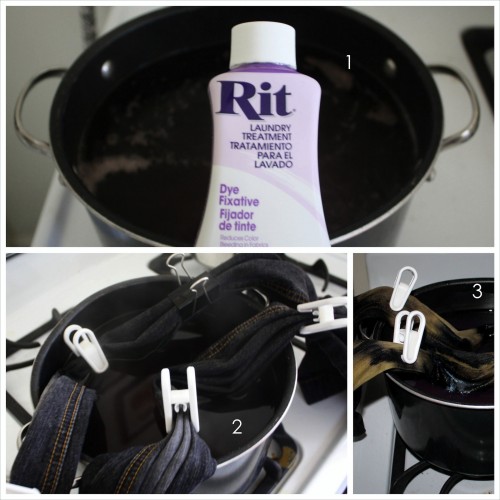
1. Dye and dye remover/bleach – I grabbed a few shades of Rit Dye to match as well as their Dye Fixative, but I ended up going with some basic bleach as well)

2. Any sort of clips/clamps

3. Black Jeans (Forever 21 has perfect and cheap options here or Levi's has great skinny black options here as well)

*Not pictured:  rubber gloves. They are an awesome idea to keep your hands from getting covered in dye.

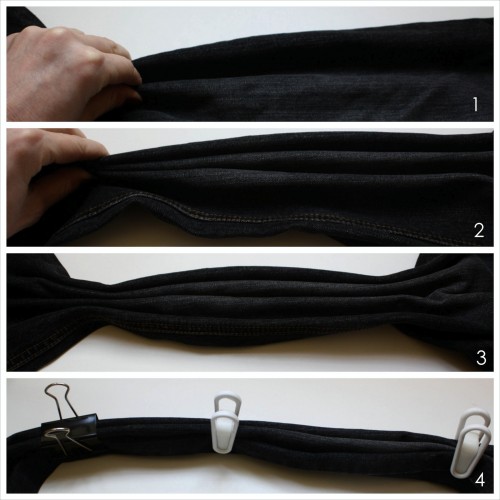
I began with a pair of black jeans that I had in my collection and created an accordion style fold (lengthwise) across each pant leg - it’s a basic gather and pinch fold. I'm wanting to create a striation with the dye to try to emulate the streaks in the original jeans, so instead of dipping the full pant in bleach, I'm trying to only have it cover smaller portions.

New Dress A Day - DIY - Hudson Jeans - Collin Brit Jeans

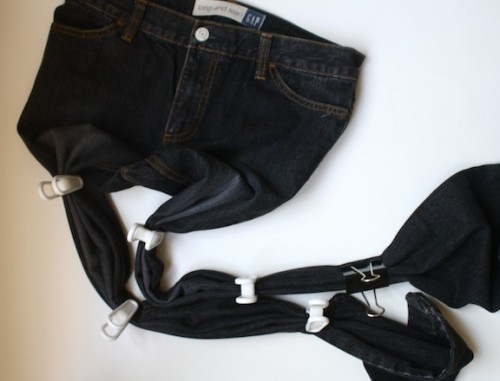
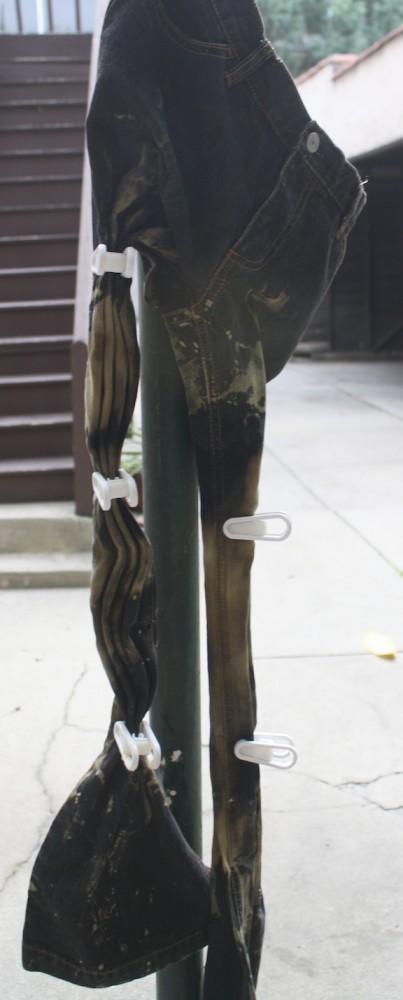
One the jeans were pinched, folded, and clipped...

New Dress A Day - DIY - Hudson Jeans - Collin Brit Jeans

...I began the dye removal in the kitchen.  I filled a pot with boiling water, the dye fixation liquid, and then bleach to make the process go a bit faster.

New Dress A Day - DIY - Hudson Jeans - Collin Brit Jeans

After I was happy with the amount of color removed, I dried the jeans and began to remove the clips to begin the dye adding process!

New Dress A Day - DIY - Hudson Jeans - Collin Brit Jeans

I grabbed dye in blue and red as well as some straws that are helpful in applying and blowing the dye to make streaks. (You can really use anything for this step - paintbrushes, q-tips, get creative!) If your pants are completely dry or depending on the kind of material that you're working with, the dye might not stick immediately. Feel free to add a little water - use a damp paper towel - to help make the dye really adhere.

New Dress A Day - DIY - Hudson Jeans - Collin Brit Jeans

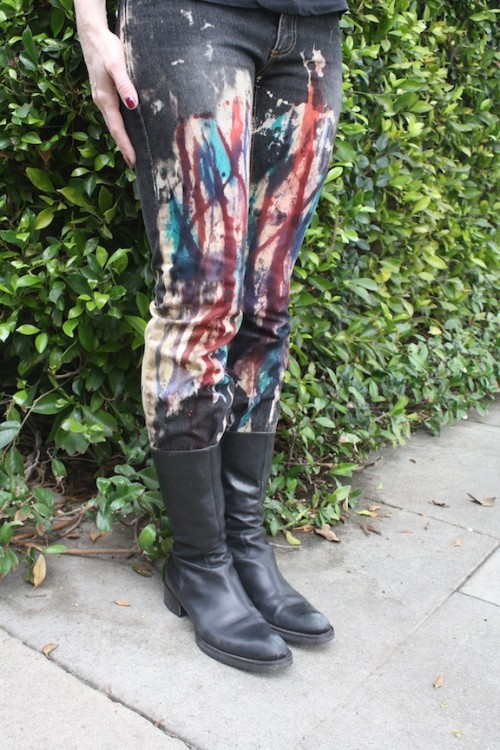
After letting the dye sit and dry, I quickly gave them a rinse under cold water, and then tossed them into the dryer to set everything in place.

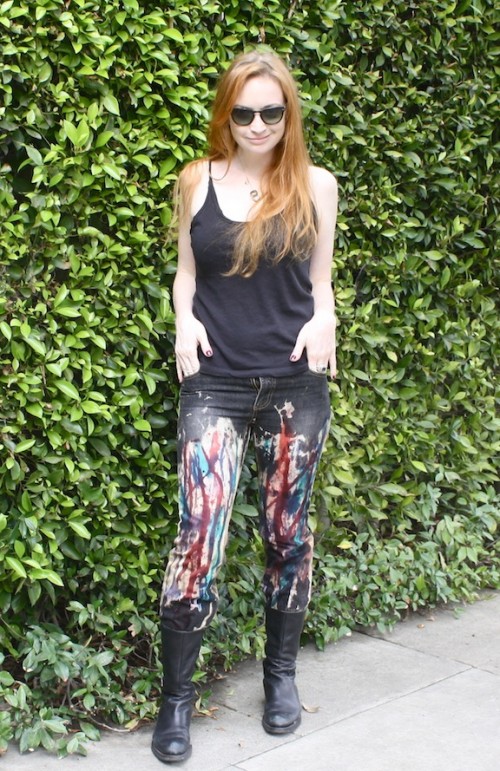
Post DIY, I have pants that totally match the original Hudson ones!

New Dress A Day - Hudson Jeans Copycat - DIY - dyed jeans

They have this rock star/Jackson Pollock-ish feel to them which makes me feel like Gwen Stefani!!

New Dress A Day - DIY - Hudson Jeans - Collin Brit Jeans

Such a fun way to add a little bit of flair to an old pair of jeans!!

New Dress A Day - DIY - Hudson Jeans - Collin Brit Jeans