Remake: Ruffle Neck Winter Florals

Weeee!! Here's the before shot of this gorgeous number... New Dress A Day - DIY - Vintage winter floral dress - clown collar - Goodwill

Lots of big, extra ruffles going on!

New Dress A Day - DIY - Vintage winter floral dress - clown collar - Goodwill

Feeling like the piece has just swallowed me.

New Dress A Day - DIY - Vintage winter floral dress - clown collar - Goodwill

Let's get this wearable!!

I began with removing one sleeve!!  I started removing stitches from the sleeve that was "in the middle" of all the ruffle action.

New Dress A Day - DIY - Vintage winter floral dress - clown collar - Goodwill

I got my one sleeve off...

New Dress A Day - DIY - Vintage winter floral dress - clown collar - Goodwill

...and then made a snip at the shoulder to completely open this side of the dress.

New Dress A Day - DIY - Vintage winter floral dress - clown collar - Goodwill

I wanted to follow the design and flow of that big ruffle, so I thought that turning this into a one-arm, asymmetrical piece would be just the thing to make it work!  With this side of the dress opened up, I began to fold and form the diagonal shape, pinning it in place.

New Dress A Day - DIY - Vintage winter floral dress - clown collar - Goodwill

I still needed to take the top portion in, but wanted to get the diagonal shape stitched down.  It's much easier to work when there aren't all kinds of pins holding the "work in progress"section in place.

New Dress A Day - DIY - Vintage winter floral dress - clown collar - Goodwill

Once the neckline was stitched, I started working on the sleeve that was leftover.  I cut it short...

New Dress A Day - DIY - Vintage winter floral dress - clown collar - Goodwill

...and then got some elastic ready to add to the end.  I pinned under the raw edge leaving about 1/2" which was going to be the area to insert the elastic.

New Dress A Day - DIY - Vintage winter floral dress - clown collar - Goodwill

I stitched a new seam at the sleeve and then inserted the elastic in the open space, using a safety pin to guide the elastic around.

New Dress A Day - DIY - Vintage winter floral dress - clown collar - Goodwill

The last step was taking in the top of the piece.  I measured the area that needed to be fitted and stitched it all in place.

The final look??

New Dress A Day - DIY - Vintage winter floral dress - clown collar - Goodwill

I paired the dress with a skinny belt and did some ruching at the waist.  I was thinking about shortening the dress but then thought if this was the plan of action, keeping it longer to save some length when it got pulled from the waist would be the smart choice.

New Dress A Day - DIY - Vintage winter floral dress - clown collar - Goodwill

I had some fun jumping around to really show the maximum wave of that ruff.  That's a big ruff!!

New Dress A Day - DIY - Vintage winter floral dress - clown collar - Goodwill

I also paired the dress with a vintage purse from the collection - it has an old Dooney & Bourke vibe, but is just a nameless, lookalike, cream/brown purse.  If it was a little larger, it would have been the perfect camera bag!

New Dress A Day - DIY - Vintage winter floral dress - clown collar - Goodwill

Oh, and those sunnies are from Forever 21 and are my new favorite purchase.  I ended up getting them on the fly when I left my sunglasses at home while I was out running errands on the brightest day ever.  Sometimes the forced purchase turns out better than the ones planned!!

New Dress A Day - DIY - Vintage winter floral dress - clown collar - Goodwill

I love the boho feel of the piece now.  It still maintains the flow, but doesn't feel overwhelmingly busy or heavy!!

New Dress A Day - DIY - Vintage winter floral dress - clown collar - Goodwill

Happy Monday, friends!!! And stay warm and safe all my East Coasters getting ready to get hit with crazy snow! xo

Copycat - Juicy Couture Nautical Hibiscus Sweater

Today's inspiration all started here... New Dress A Day - Juicy Couture Nautical Hibiscus Sweater - DIY

I was having a movie night with my pal BU and the storefront at Juicy Couture caught our eyes.  We loved the sweater that hung in the window and had an immediate moment of, we can DIY this!

So, that's what today's project is...my version of Juicy's Nautical Hibiscus Sweater.

New Dress A Day - DIY - Copycat - Juicy Couture Nautical Hibiscus Sweater

To really emulate the essence of Juicy's sweater, I wanted something royal blue to work with and found just the right piece - a Mossimo sweater from Target that I scored at Goodwill for $3!

New Dress A Day - DIY - Goodwill Target Sweater

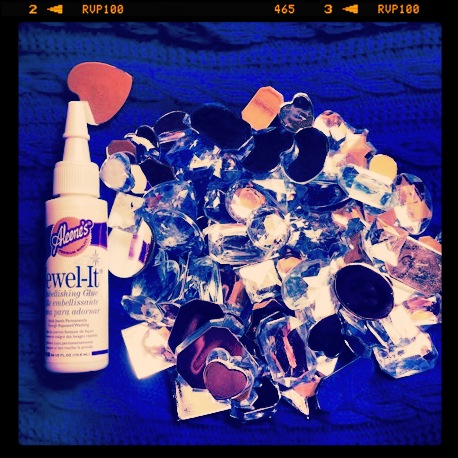
Now that I had the perfect base, it was time to get crafty!!  I started with some rhinestones (these larger ones came from Darice's "Big Bag of Bling") and Aleene's Jewel-It glue...

New Dress A Day - DIY - Glue & Rhinestones

...and began my copycat adventures!

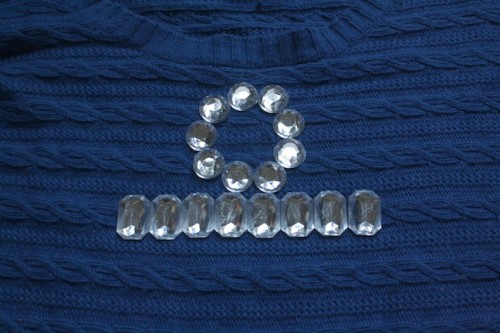
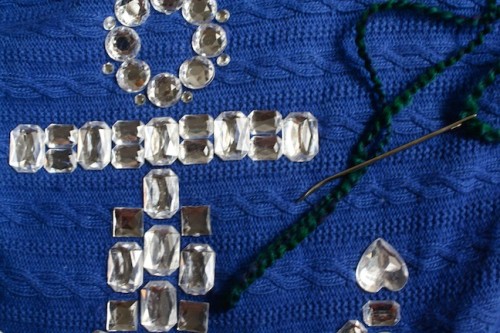
I started off by recreating the anchor on the sweater, just by placing down rhinestones.  Before I began rhinestoning, I put a magazine in-between the top and bottom layers of the sweater just to avoid any issues, come glue time, of the top and bottom sticking to each other from seeping glue!  Not until I was happy with the formation did I begin gluing.  I think this actually might have been the trickiest part of the project!!

New Dress A Day - DIY - Glue & Rhinestones

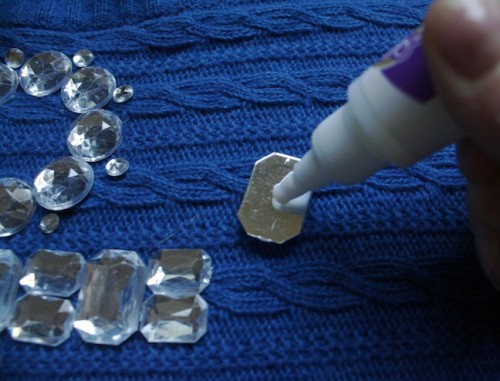
Once I was happy with the design, it was glue time!  I put dabs of glue on the back of each stone, placed them down in their spot...

New Dress A Day - DIY - Glue & Rhinestones

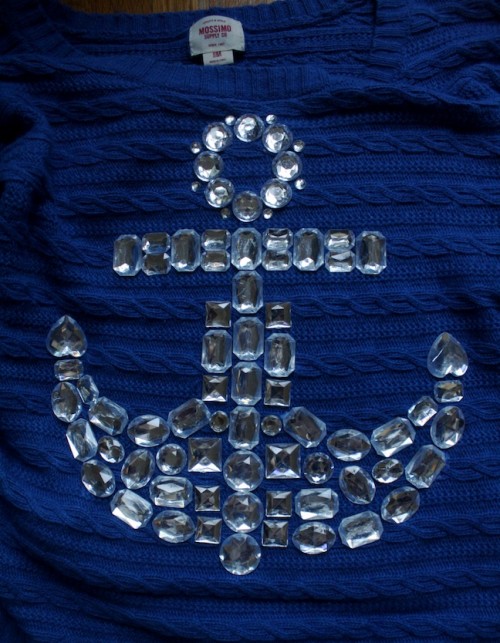
...and then let the newly formed anchor dry overnight!

New Dress A Day - DIY - Rhinestone Anchor

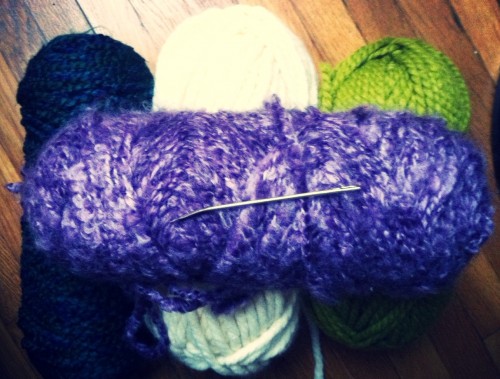
Once my anchor was dry, I began the yarn portion of the project!  Seeing how there were lots of green shades of yarn forming sorts of leaves and some white/purple/pink shades creating the hibiscus flowers, I went to my knitting stash and pulled out the appropriate colors.  (I ended up snagging the lime skein at Joann's for $4 to complete the foursome because that was the one color I was missing.)

New Dress A Day - DIY - Yarn Assortment

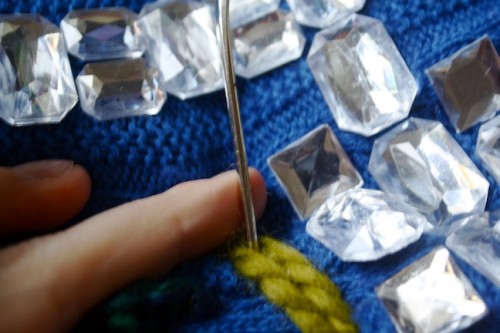
I took a huge needle from my sewing collection, weaved the forest green yarn through, and knotted the ends of the yarn before I began my stitching.  I freestyled this part of the project weaving in and out of the sweater, going over stitches multiple times to give the leaves a bit more depth.

New Dress A Day - DIY - Yarn Assortment

I had the image of the Juicy sweater on my computer as a template to look at as I made my way around the anchor.

New Dress A Day - DIY - Juicy Couture Copycat - Yarn Stitching

With my leaves completed, I created the flowers next.  I found a traceable image of a hibiscus...

New Dress A Day - DIY - Juicy Couture Blue Hibiscus Sweater

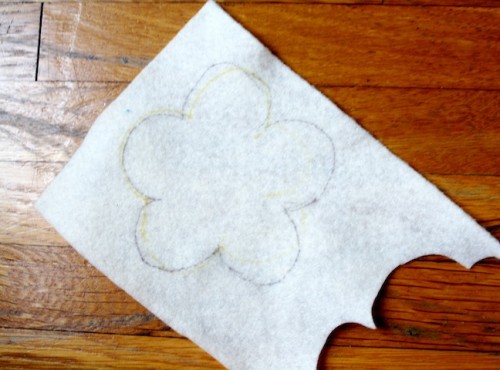
...and used this as a pattern to cut out three flowers from felt.  Once my flowers were trimmed...

New Dress A Day - DIY - Hibiscus tracing

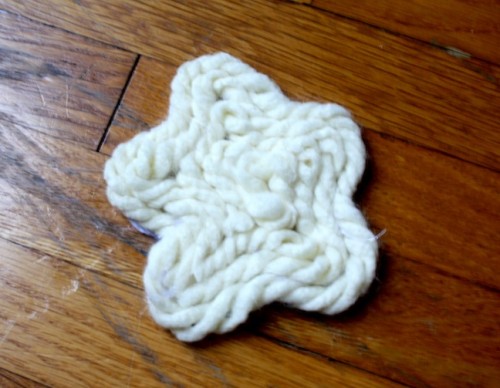
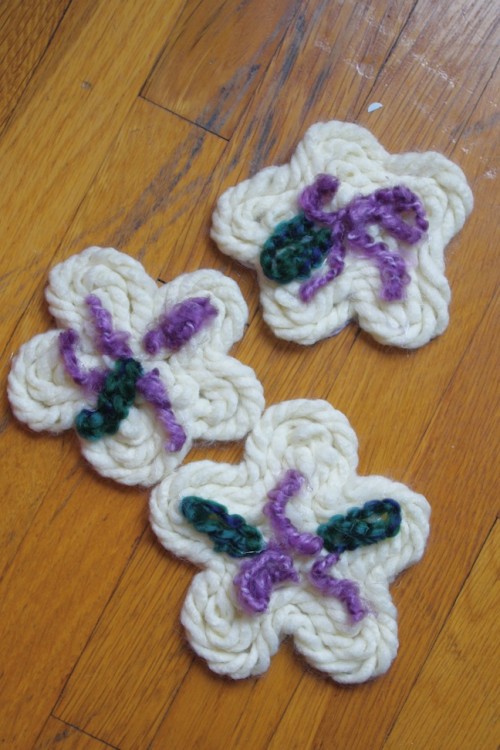
...I took the ivory yarn and followed the outline of the flower while hot gluing the yarn in place.  I kept following the shape of the cut out until the entire flower was covered in yarn.  I was going to stitch these flowers down directly to the sweater, but I opted to add pin-backs to them instead so they'd be easily removed when washing.  (Feel free to take whichever route you feel most comfortable doing!  I can always go back and make the flowers more permanent, but for today I was super pleased with the removable flair!)

New Dress A Day - DIY - Yarn flowers

Once the ivory yarn was set, I grabbed the forest green yarn along with some purple.  I tried to mimic the flowers on the Juicy sweater by adding a few flecks of the purple in the center as well as the green.

New Dress A Day - DIY - Yarn flowers

I pinned down the flowers to the sweater next and couldn't wait to get this piece on!!

New Dress A Day - DIY - Juicy Nautical Hibiscus Sweater Copycat

I have to say, I love how this turned out!!

New Dress A Day - DIY - Juicy Nautical Hibiscus Sweater Copycat

I wore it out to dinner and the gentleman server even complimented me on it!  Nothing like saying that I made it myself and saving close to $260 at the same time.  Yep, you heard me!  (Full pricing below...)

I thought about trying to make the stripes on the arms, but actually liked the piece better all blue!  Also, the sleeves hit about 3/4 length on my thrifted sweater, so it really didn't even matter.

New Dress A Day - DIY - Juicy Nautical Hibiscus Sweater Copycat

I could add more leaves to make the sweater fuller (which is how Juicy's looks) however I'm really enjoying the placement as is.

New Dress A Day - DIY - Juicy Nautical Hibiscus Sweater Copycat

After all is said and done, my sweater cost just about $9 - $3 for the sweater, $4 for the yarn, and $2 for the rhinestones.  Whoot, whoot!!  Not a bad job when the inspiration piece retailed for $268.

New Dress A Day - Juicy Couture Nautical Hibiscus Copycat

Happy Monday, friends!  Hope you all had a fantastic weekend!

PS, couldn't resist a little sidewalk shoot outtake...um hello Marisa, trying to jump just as the shutter was closing, but epic-ly failing :)

New Dress A Day - DIY - Juicy Couture Nautical Hibiscus Sweater - DIY

Packing Update!

Hello everyone! Apologies for the lack of posts this past week - my impending move has me working overtime! It's a go to work, get home at 7pm, and pack routine before crashing a few hours later. The next two weeks are going to be crazy/fun/exhausting/cathartic as I get everything I want to hold onto boxed up and the rest of the things off to Goodwill. New Dress A Day - Moving Boxes

My new place has bookshelves in the walls, so I'm excited to have a place for all of my books! I did put a stash together to donate, though. Do I really need two copies of the first Harry Potter book? (It was a toss up, but...no.)

I found this new style of bracelet the best for holding onto tape without losing it or forgetting where I put it.

New Dress A Day - packing tapeNew Dress A Day - packing tape

I'm certain that a roll got put into a box :)

Like my new chair??

New Dress A Day - Kitchen

I'm taking my break moments where I can get them! More to come and you'll be seeing a bunch of your own creations getting posted while I'm working away.

Anyone have any great packing tips?? I'll take whatever I can get!! xo