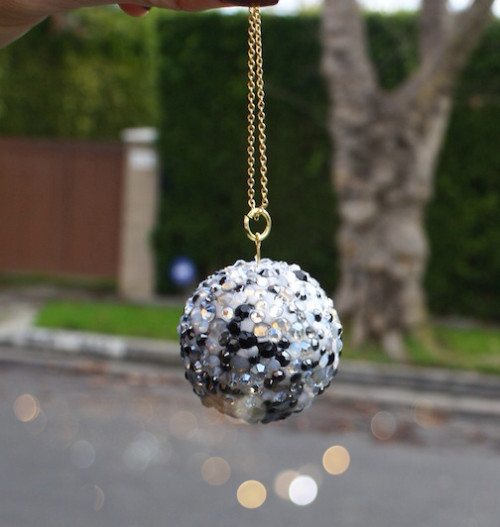
DIY: Swarovski Disco Ball Necklace

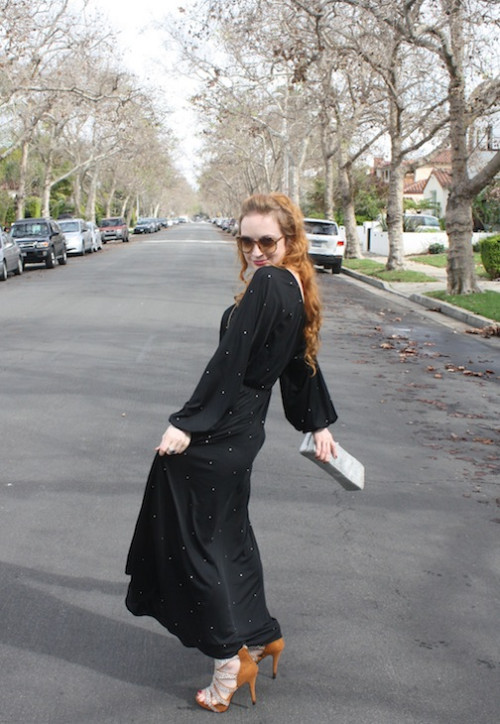
Today's Oscar finale is American Hustle-inspired!!  I found a fabulous 70s dress covered in gems and thought I'd DIY some accessories to accompany. Disco balls on my ears and 'round my neck?  Check!!  New Dress A Day - vintage 70s dress-- American Hustle Costumes - DIY Swarovski Disco Ball Necklace

Check out how to get this fun necklace using these supplies...

New Dress A Day - vintage 70s dress-- American Hustle Costumes - DIY Swarovski Disco Ball Necklace

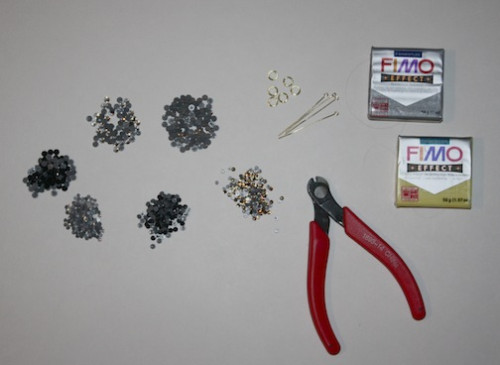
For these disco-themed accessories, I used:

1. Assorted Swarovski crystals (different shades of blacks, greys, silvers, and opals)

2. Jump rings  (I used three!)

3. Hat eye pins  (I used three!)

4. A pair of jewelry wire side cutters

5. Fimo modeling clay

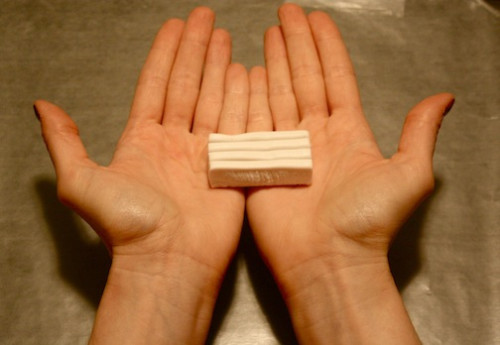
Once I had my supplies laid out, I started with some of the Fimo clay and began to mold it into a sphere.

New Dress A Day - vintage 70s dress-- American Hustle Costumes - DIY Swarovski Disco Ball Necklace

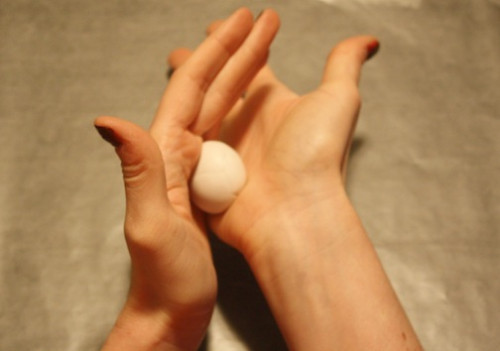
I rolled it between my palms...

New Dress A Day - vintage 70s dress-- American Hustle Costumes - DIY Swarovski Disco Ball Necklace

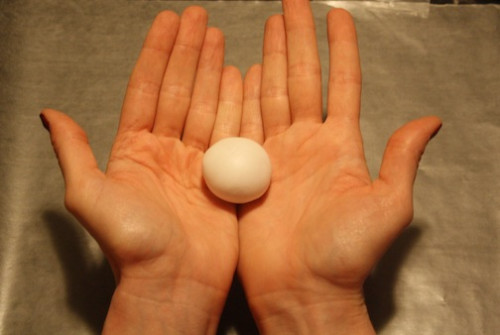
...until I had a lovely round ball of clay!

New Dress A Day - vintage 70s dress-- American Hustle Costumes - DIY Swarovski Disco Ball Necklace

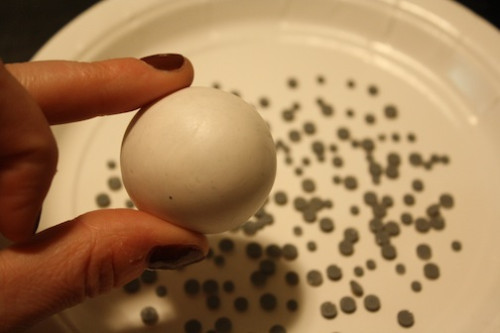
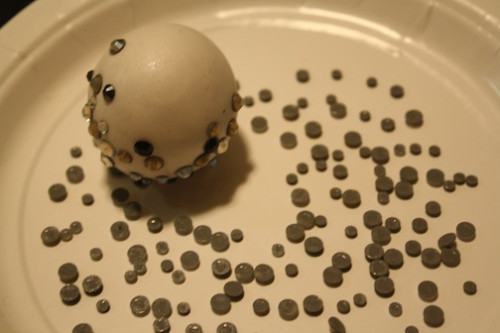
Next, I took the assorted Swarovski crystals and turned them face down onto a plate.  Let the flat backs face up for the easiest gem to clay application...

New Dress A Day - vintage 70s dress-- American Hustle Costumes - DIY Swarovski Disco Ball Necklace

...and roll the clay on top of the stones.  Using a little bit of pressure, the stones will stick onto the clay.  I used this method until most of the stones covered the clay and then put crystals on individually to cover the holes.

New Dress A Day - vintage 70s dress-- American Hustle Costumes - DIY Swarovski Disco Ball Necklace

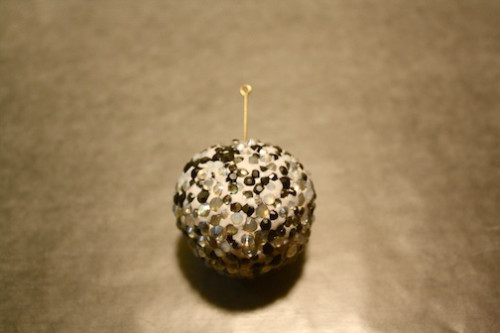
With the assorted gems on the ball of clay, I inserted a trimmed hat eye pin into the center of the ball.

New Dress A Day - vintage 70s dress-- American Hustle Costumes - DIY Swarovski Disco Ball Necklace

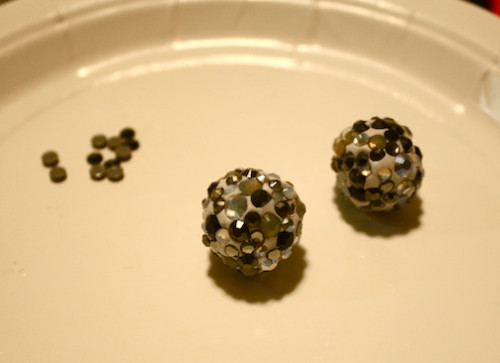
Since I had enough crystals, I made matching disco ball earrings with two smaller balls of clay.  I repeated the above steps...

New Dress A Day - vintage 70s dress-- American Hustle Costumes - DIY Swarovski Disco Ball Necklace

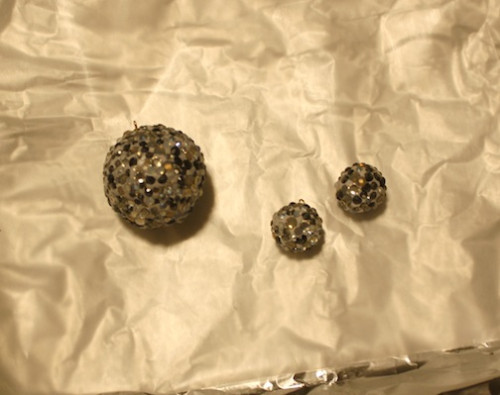
...laid all three pieces on top of a wax paper/foil combo...

New Dress A Day - vintage 70s dress-- American Hustle Costumes - DIY Swarovski Disco Ball Necklace

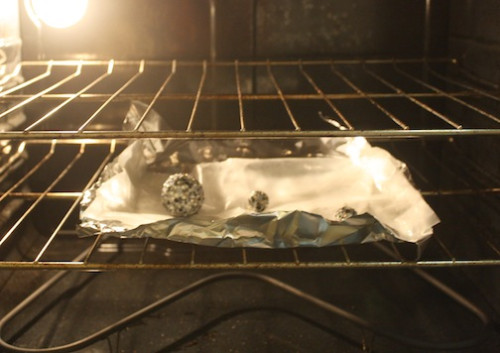
...and baked them in the oven per the instructions on the packets of Fimo.  (275F for at least 15 minutes - test pieces to see that they're cooked through. The earrings were in for 30 mins and the necklace one hour because of its thickness. I tested every 15 minutes to check)

New Dress A Day - vintage 70s dress-- American Hustle Costumes - DIY Swarovski Disco Ball Necklace

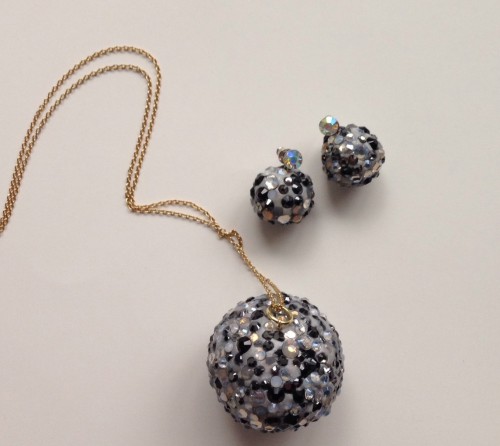
Once they were done and attached to a chain and earring posts, it was time to rock 'em!!

New Dress A Day - vintage 70s dress-- American Hustle Costumes - DIY Swarovski Disco Ball Necklace

Hello new sparkles!!

New Dress A Day - vintage 70s dress-- American Hustle Costumes - DIY Swarovski Disco Ball Necklace

I loved the subtleness of the earrings!  I don't ever wear hanging earrings but had to take these for a spin!

New Dress A Day - vintage 70s dress-- American Hustle Costumes - DIY Swarovski Disco Ball Necklace

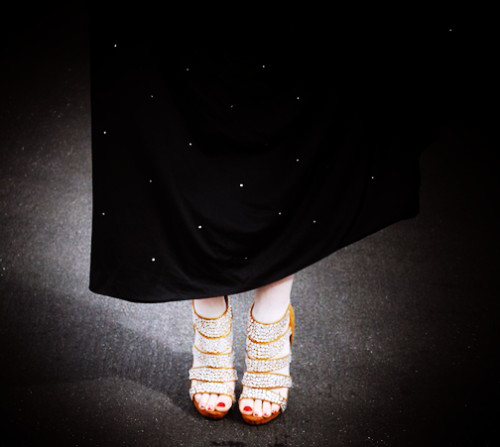
And, I matched my crystal-swathed neck and ears with those DIY Swarovski encrusted heels I made a few months back...

New Dress A Day - vintage 70s dress-- American Hustle Costumes - DIY Swarovski Disco Ball Necklace

...I mean in this instance, you just can't get too much sparkle!

New Dress A Day - vintage 70s dress-- American Hustle Costumes - DIY Swarovski Disco Ball Necklace

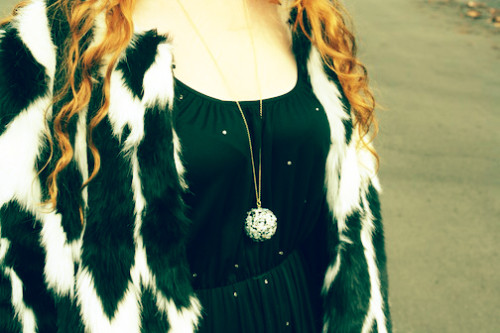
I tossed on my black and white faux fur Dorothy Perkins jacket for a few super 70s shots.

New Dress A Day - vintage 70s dress-- American Hustle Costumes - DIY Swarovski Disco Ball Necklace

This is going to be the perfect piece to pair with my non-themed ensembles too!

New Dress A Day - vintage 70s dress-- American Hustle Costumes - DIY Swarovski Disco Ball Necklace

I really don't think there could have been more crystals and rhinestones covering my body.

New Dress A Day - vintage 70s dress-- American Hustle Costumes - DIY Swarovski Disco Ball Necklace

Kind of fun dancing in the streets, though!

New Dress A Day - vintage 70s dress-- American Hustle Costumes - DIY Swarovski Disco Ball NecklaceNew Dress A Day - vintage 70s dress-- American Hustle Costumes - DIY Swarovski Disco Ball Necklace

The mix of stones make it look super cool from afar!

New Dress A Day - vintage 70s dress-- American Hustle Costumes - DIY Swarovski Disco Ball Necklace

I think I might have found my new favorite statement necklace!!

New Dress A Day - vintage 70s dress-- American Hustle Costumes - DIY Swarovski Disco Ball Necklace

Easy to make, and chic?  Total score!!

PS, who were your faves from the Oscars??  Full chat later today!

Copycat: Stolen Girlfriends Club Fringe Sweatshirt

My heart beats twice for fringe so when I saw this sweatshirt originally worn by Jenny Slate on Parks and Recreation earlier this season, I took a screen shot and added it to the to-do list!! (For those Parks and Rec fans, you can head over here to HelloGiggles to read the post with the full TV tie in! This is one of my faves on TV and Jenny's character is the best. I heart Mona Lisa Saperstein!) It was a basic grey sweatshirt with suede fringe on the front of it...

Hello Giggles - New Dress A Day - Parks & Rec - suede fringed sweatshirt - DIY

...made by Stolen Girlfriends Club.

Hello Giggles - New Dress A Day - Parks & Rec - suede fringed sweatshirt - DIY

To me, it was the perfect piece to DIY. This is something that can easily be done with a grey shirt that’s already in your collection or one scored from Old Navy (which is the one that I used).

Here’s a rundown of the supplies you’ll need:

Hello Giggles - New Dress A Day - Parks & Rec - suede fringed sweatshirt - DIY

1. Suede fringe trim from your local craft store (this is from M&J Trimming)

2. Fabric glue or thread (Aileen’s Fabric Fusion is a great option)

3. Grey sweatshirt (here’s the Old Navy one I used (*it's on sale for less than $6!! but there isn't full sizing. Here’s another great option from Kohl’s that can also work.)

I began with my grey sweatshirt and placed the trim in a V shape to mimic the original piece.

Hello Giggles - New Dress A Day - Parks & Rec - suede fringed sweatshirt - DIY

With the V shape made, I began to pin the fringe trim in place.

Hello Giggles - New Dress A Day - Parks & Rec - suede fringed sweatshirt - DIY

Once the trim was pinned down…

Hello Giggles - New Dress A Day - Parks & Rec - suede fringed sweatshirt - DIY

…I grabbed a magazine to put in-between the sweatshirt layers…

Hello Giggles - New Dress A Day - Parks & Rec - suede fringed sweatshirt - DIY

…and started to glue the trim in place. This is a heavy duty fabric adhesive so the trim will stick super duper well! If you have a sewing machine, a quick stitch at the fringe seam will work like a charm as well.

Hello Giggles - New Dress A Day - Parks & Rec - suede fringed sweatshirt - DIY

Once the glue dried and the trim was affixed, it was time to wear the sweatshirt!

Hello Giggles - New Dress A Day - Parks & Rec - suede fringed sweatshirt - DIY

Jenny Slate is my brunette sista.

Hello Giggles - New Dress A Day - Parks & Rec - suede fringed sweatshirt - DIY

I totally shoulda made that face.

Hello Giggles - New Dress A Day - Parks & Rec - suede fringed sweatshirt - DIY

This is such a comfortable piece to add to the wardrobe...

Hello Giggles - New Dress A Day - Parks & Rec - suede fringed sweatshirt - DIY Hello Giggles - New Dress A Day - Parks & Rec - suede fringed sweatshirt - DIY

...and it couldn't be easier to make!!

Hello Giggles - New Dress A Day - Parks & Rec - suede fringed sweatshirt - DIY

JS' tiger necklace is totally legit too.

Hello Giggles - New Dress A Day - Parks & Rec - suede fringed sweatshirt - DIY

I opted to go sans necklace, but you can get a matching version of hers at TopShop. The more I look at it the more I want it!

Hello Giggles - New Dress A Day - Parks & Rec - suede fringed sweatshirt - DIY

DIY eagle necklace soon? Just might be the next project on the agenda!

DIY: Indigo Dyed Shawl

Today's post is a fun one!! I got together with crafty pal KC of Make Shop Live and the co-founder of the Academy of Handmade (for those crafters out there, check it out - it's a super rad community of crafty people with a yearly awards show just like the Oscars! The nominations begin today, so head on over and cast a vote using the code ILoveHandmade) to work on some Indigo dyeing, something I've never done before. KC is a pro, so I got a master class. I started with this vintage shrug that I've held onto for years, just waiting for the perfect project to use it for. I think you're going to like the outcome!
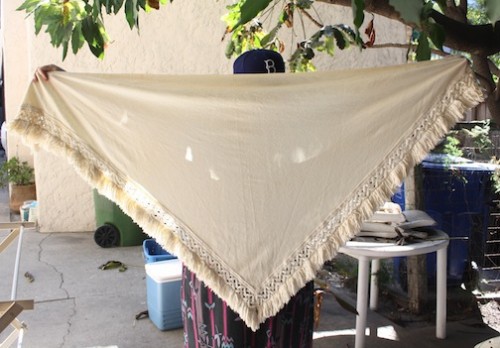
New Dress A Day - DIY - Indigo Dyeing - Vintage Shawl

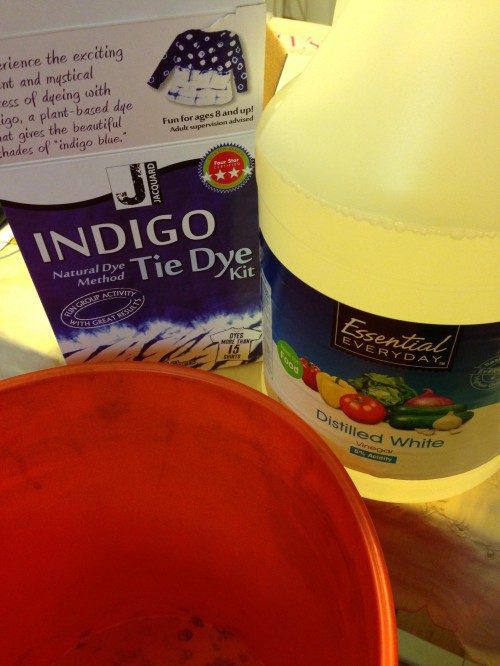
To begin, you'll need a basic Indigo Dye Kit (here are two options - mini & large that can be found on Amazon for $12 and $17 respectively) as well as these supplies:

WHAT YOU'LL NEED:

(2) 5 gallon buckets with lid (The ones we used are from Home Depot.)

Plastic tarp / old shower curtain / some kind of covering for your workspace

Gloves (vinyl or latex)

Vinegar

Rubber bands, string, clothes pins, binder clips and other items that can be use to create resist patterns on the dyed item

Synthropol or phosphate free soap (Here's a cheap batch for $4 on Amazon)

The best pieces to dye will be items made out of natural fibers - 100% cotton, silk, hemp, wool, or rayon and should be pre-washed for optimum dyeing.
New Dress A Day - DIY - Indigo Dyeing - Vintage Shawl - Dye Bath

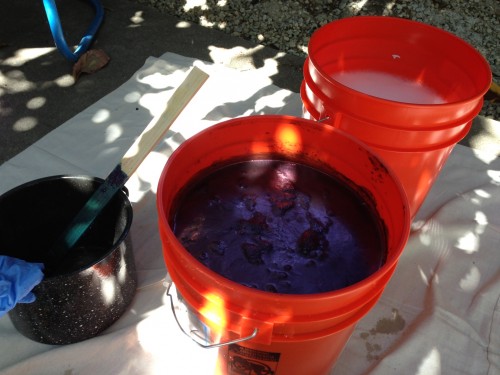
Prepare the Indigo bath following manufactures instructions. The Indigo will take around an hour to be ready for dyeing so in the meantime, set up your rinse bath. Using one of the buckets, get your rinse water started with warm water and a few drops of Synthropol. (The Synthropol bucket is in the back - fill it up about 2/3 full).
New Dress A Day - DIY - Indigo Dyeing - Vintage Shawl - Dye Bath

This mix is highly concentrated so use just one or two drops. Soak the items you will be dyeing for 2-3 minutes in this water bath to open up the fibers. This also helps reduce uneven dyeing or spotting. Wring out as much water as possible and then prepare any tie dye techniques using rubber bands or other resist instruments before adding to dye bath.

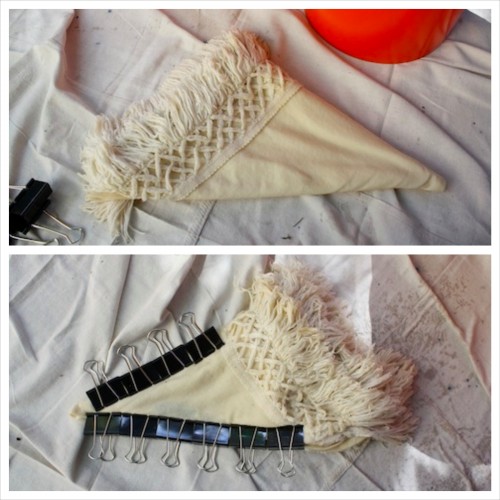
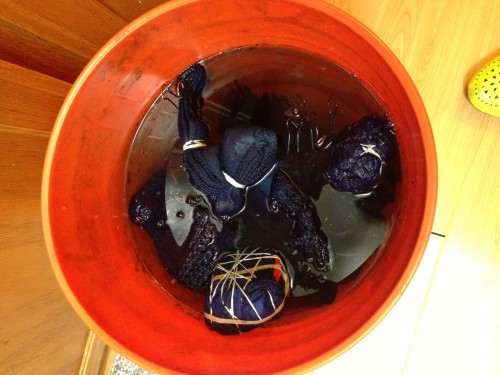
We wet the shawl, folded it up, and used binder clips as our resistant instruments. These happened to work best, but you can get creative and use washers or paper clips to wrap the fabric around.
New Dress A Day - DIY - Indigo Dyeing - Vintage Shawl - Dye Bath

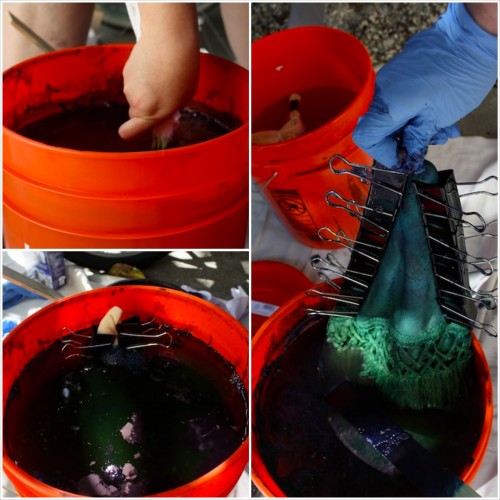
Dye time! When dyeing, there are a few things to keep in mind. You want your fabric to move freely in the bucket without just resting on the bottom. This can cause spotting and uneven color if your item rests for an extended time on the bottom of the bucket. You will also want to be mindful that the Indigo process uses oxygen, so any extra oxygen introduced to the dye lessens the potency. You definitely do not want to over stir the bath and will want to push it around so that it is dyeing evenly without adding extra air instead. We used old wooden spoons and rulers to push the items around.
New Dress A Day - DIY - Indigo Dyeing - Vintage Shawl - Dye Bath

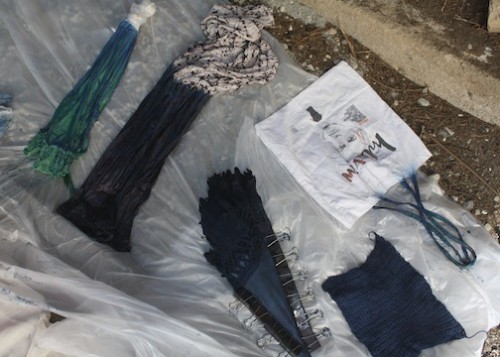
When the items leave the dye bath you will be able to see the oxygen process at work. The fabric changes color like magic! Indigo looks like a fluorescent yellow/green shade on the fabric once it comes out of the bath and then once it is exposed to air, you can see the process continue. The Indigo slowly changes the fabric from this green shade to a deep blue, the final color the piece will turn. This is one of the coolest parts of the whole process!
New Dress A Day - DIY - Indigo Dyeing - Vintage Shawl - Dye Bath

Your item may appear darker than the end result while drying. You can deepen the blue by introducing the item back into the dye bath and repeating the process as many times as you'd like to achieve a deeper color.

It's best to air dry the project completely before rinsing the color, usually overnight (24 hours is ideal). This really bonds the color as much as possible. Another trick to keep the color rich and deep, as well as prolonging fading, is to rinse with a mixture of water and vinegar. This 50/50 ratio of water to vinegar works really well in maintaining the color

(Note on Indigo: Indigo dye fades with wear and time. This is natural and one of the beautiful properties of this dye, so for this reason you may want to choose items that do not need heavy laundering to preserve color.)
New Dress A Day - DIY - Indigo Dyeing - Vintage Shawl - Dye Bath

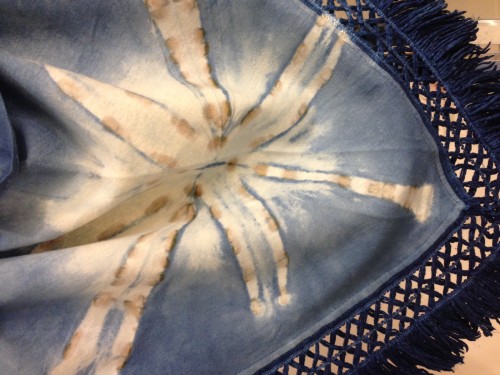
Soak the fabric briefly in the vinegar water, then rinse in cold water until the water is clear. Follow up with a wash in Synthropol and you are good to go.
New Dress A Day - DIY - Indigo Dyeing - Vintage Shawl - Dye Bath

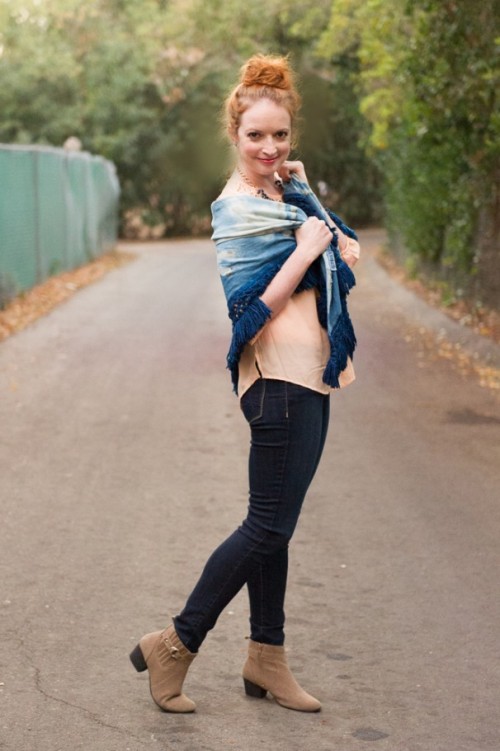
With my newly dyed shawl complete, I had a fun photo shoot with the lovely Shauna over at Penny Chic! (Head on over to Penny Chic to see more pics from the day!)
New Dress A Day - DIY - Indigo Dyeing - Vintage Shawl - Dye Bath

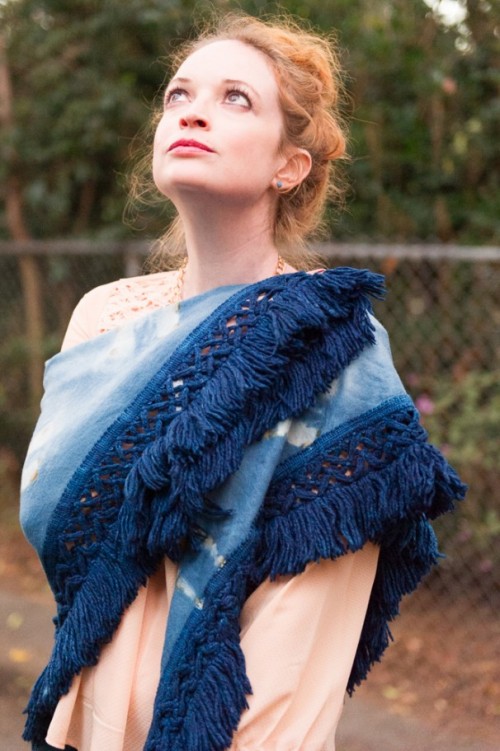
I love how bold the color turned out.
New Dress A Day - DIY - Indigo Dyeing - Vintage Shawl - Dye Bath

It's the best new cover-up to toss on top of a blouse when it's not super cold, but chilly enough to need an extra layer. Or, the perfect layer or big scarf to add on top of a thick jacket (I'm talkin' to you East Coasters/Mid-Westerners/other colder spots outside of the US that don't have these Southern California temperatures at the moment!)
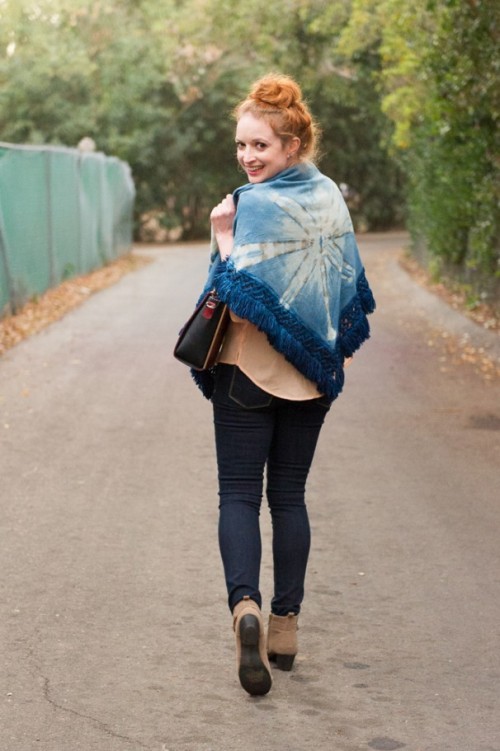
New Dress A Day - DIY - Indigo Dyeing - Vintage Shawl - Dye Bath

We paired the shawl with a gorge Boho top, statement necklace, and Denizen by Levi's jeans all from Target, a pair of ankle boots by Cotton On, and the most fun Sole Society purse.
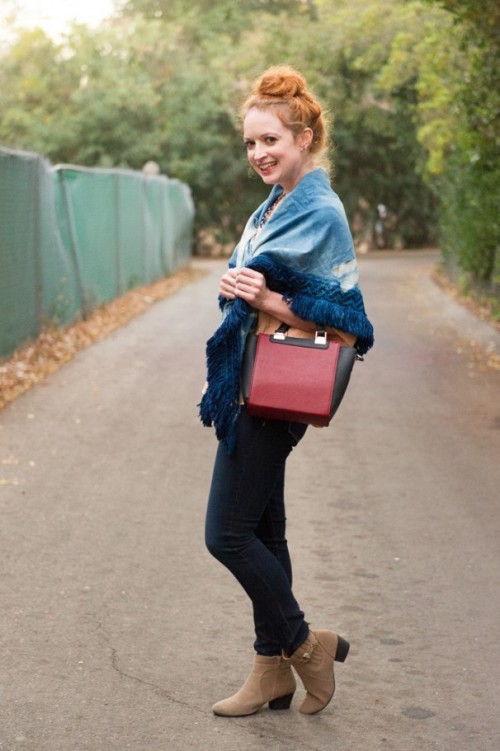
New Dress A Day - DIY - Indigo Dyeing - Vintage Shawl - Dye Bath

It's the cutest date night ensemble!!
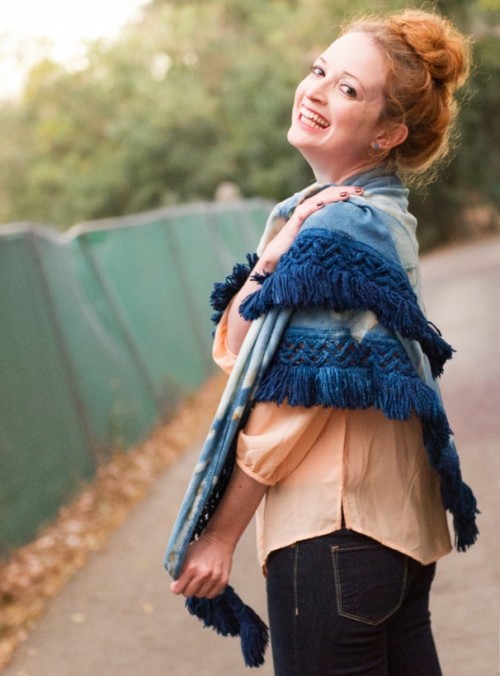
New Dress A Day - DIY - Indigo Dyeing - Vintage Shawl - Dye Bath

Thank you to the fabulous Penny Chic team and Shideh Miller for photographing this chic and cozy ensemble!

Any of you guys have experience with Indigo dyeing? I'd love to hear your stories!